For questions about finch enclosures (cages & aviaries).
-
NaOH55
- Hatchling

- Posts: 36
- Joined: Thu Jun 21, 2007 10:23 am
- Location: Chicago, IL
Post
by NaOH55 » Sat Sep 15, 2007 5:45 pm
-
EmilyHurd
- Complete Clutch

- Posts: 865
- Joined: Wed Feb 14, 2007 8:10 pm
- Location: Colorado
Post
by EmilyHurd » Sat Sep 15, 2007 10:00 pm
That was some great thinking on your end! Good luck with the cage, I'm sure your finches love it!

-
kenny
- Weaning

- Posts: 1778
- Joined: Sat Jul 15, 2006 3:45 pm
- Location: East Yorkshire,England
Post
by kenny » Mon Sep 17, 2007 7:35 am
it looks perfect for finches..as most birds dont need the height as long as they have a long length to fly they will keep fit enough!
ken
you can always tell a yorkshireman,but you cant tell him much
-
NDan
- Nestling

- Posts: 77
- Joined: Tue Aug 08, 2006 11:26 am
- Location: Grand Forks, ND
Post
by NDan » Wed Sep 19, 2007 9:06 am
I've thought about doing this for a while. Its great to see an example. I have one cage that is tall.... maybe I'll try this.
-
Sally
- Mod Extraordinaire

- Posts: 17929
- Joined: Thu Mar 29, 2007 11:55 pm
- Location: DFW, Texas
Post
by Sally » Wed Sep 19, 2007 4:30 pm
I, too, have an extra tall cage--it is sitting in storage collecting dust, as I found it just didn't work with finches. It would be a fantastic parakeet cage. But now maybe I can make some use of it turning it into a horizontal flight cage. Thanks for the info.
-
Sally
- Mod Extraordinaire
- Posts: 17929
- Joined: Thu Mar 29, 2007 11:55 pm
- Location: DFW, Texas
Post
by Sally » Fri Sep 21, 2007 12:10 pm
Couple of questions:
1. Did you make the base just around the perimeter, or did you use a piece of plywood under the bottom, then have the three pieces of wood as the perimeter for the cage to sit on? And did you fasten the cage to the base with something like staples?
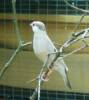
2. My cage is about the same size - 50x18x30 - so I can use the catch tray like you did, but what did you use for the other catch tray? Did you build one out of wood? It looks from the photo like a catch tray from another cage.
3. I would have the same thing with the old bottom now on one end, but I thought about cutting off the bottom with metal snips. Think that would work?
-
NaOH55
- Hatchling
- Posts: 36
- Joined: Thu Jun 21, 2007 10:23 am
- Location: Chicago, IL
Post
by NaOH55 » Sat Sep 22, 2007 10:16 am
1. Another piece of wood for the bottom. Unfortunately I didn't get to take photos of the building process, but this bottom piece was a plank, 7" wide, 1/2" thick. Being that wide all you need is one piece running the length and the trays are perfectly stable.
2. It is another catch tray, a cannibalized one. I used the tray from my old 30x18x18 petco flight and cut it down to size. I'm a little torn between seeking out some custom alternative or sticking with the two trays. With two, clean up is a little easier not trying to maneuver a 4 foot tray to the waste bin.
3. It would work just fine, but if you do I'd advise you have a grinder or file handy to smooth out the edges and maybe even a little bit of touch up paint to ward off rust/corrosion.
A few extra notes, I didn't secure it to the base; Its own weight takes care of that. If you're going with the standard dowels be sure to get them 19" or over, I tried the 18.5" and they are way too loose.
Last edited by
NaOH55 on Sat Sep 22, 2007 10:24 am, edited 1 time in total.
-
Sally
- Mod Extraordinaire
- Posts: 17929
- Joined: Thu Mar 29, 2007 11:55 pm
- Location: DFW, Texas
Post
by Sally » Sat Sep 22, 2007 10:23 am
Thanks for the info! Now I can put that cage to use, instead of having it sitting around collecting dust. Once before, I took two 30x18x36 flight cages, removed two ends, and put them together for a 60x18x36 flight. I did it in a hurry, without planning, so it was somewhat wobbly, but I think I might do it again, with a little wood framing for stability. I want some longer flights, and I have 8 of those flight cages, so wouldn't cost me much at all to convert them. Thanks again for the inspiration!