Finished my indoor aviary
Posted: Tue Sep 30, 2008 4:01 pm
Finally finished my indoor avairy.
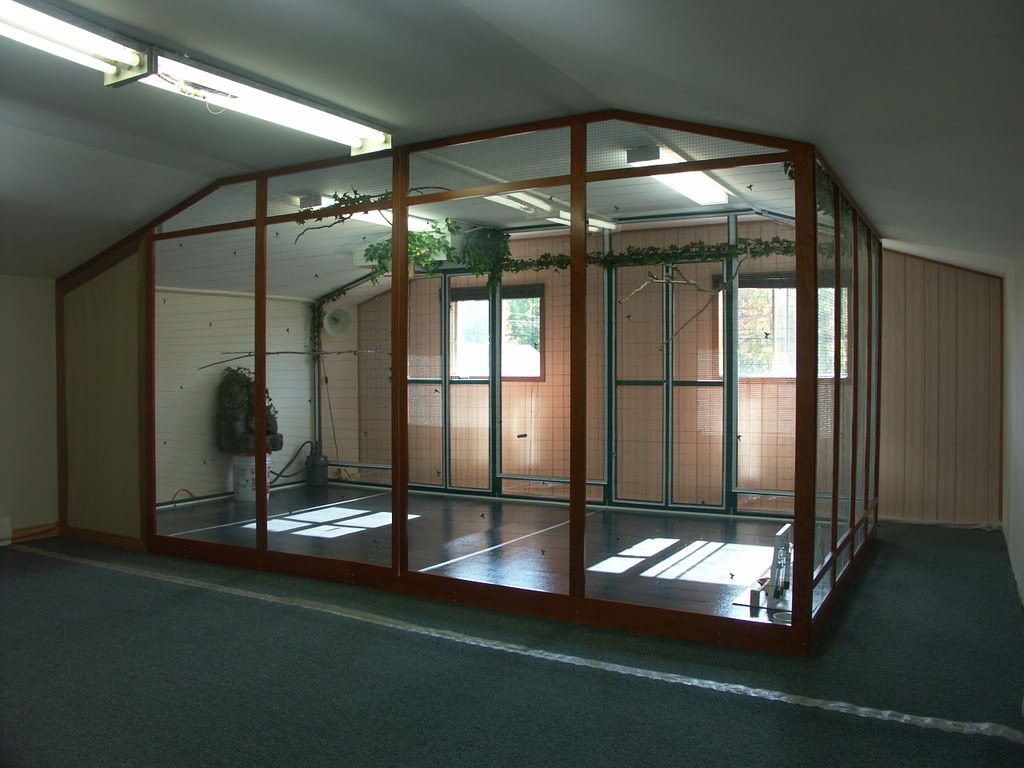
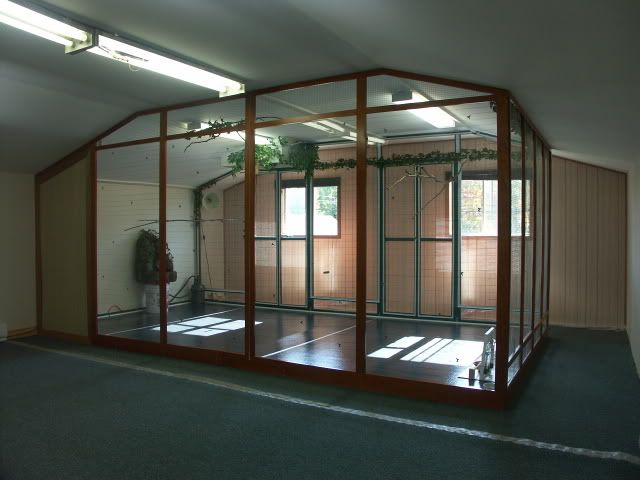
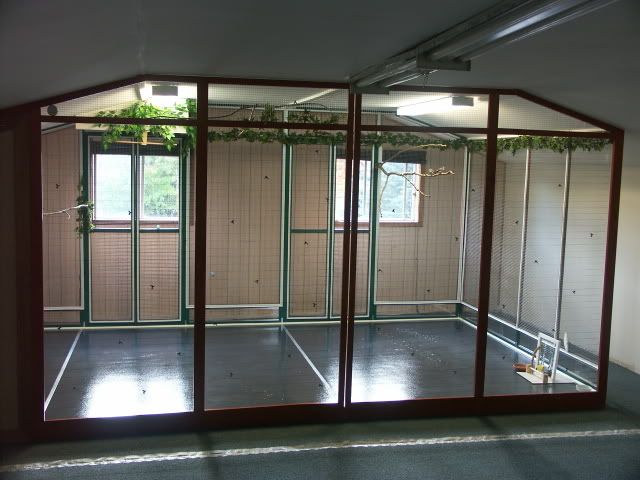
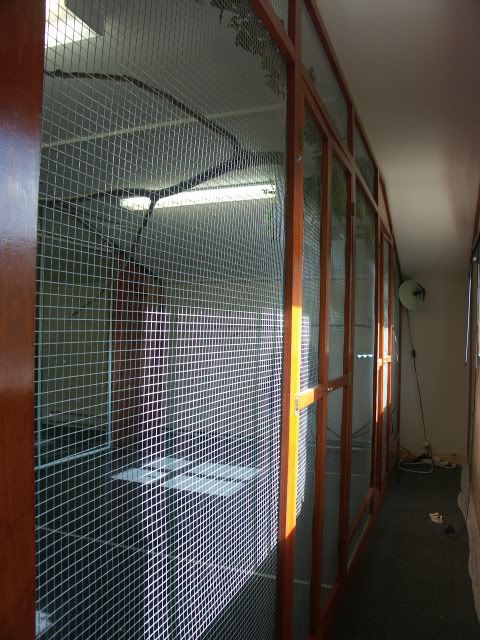
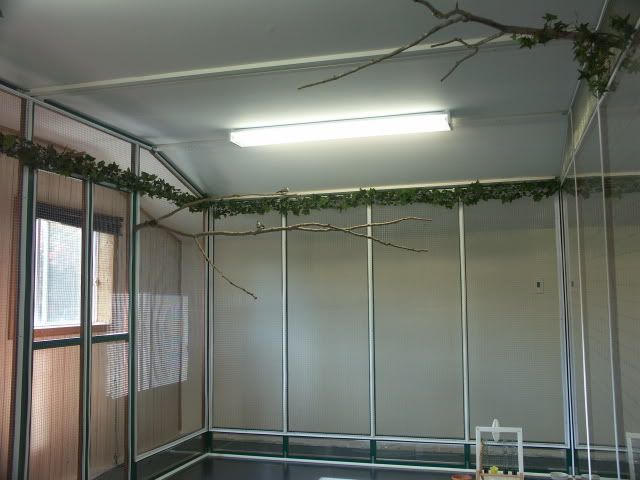
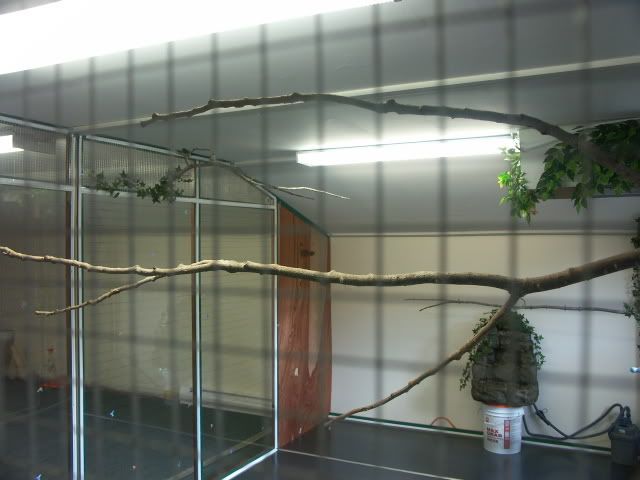
It's located in a large room over my garage. Size is 15' x 8'. It can be easily divided into 2 flight areas if required. Two double doors provide access as well as a series of plexiglass sliding doors along the bottom. The day lights, night light (15watt), and waterfall (9watt) are on timers. The waterfall is powered by a Fluval aquarium filter. So far the owls haven't gone near the waterfall. I'm hoping in time they'll get used to it. There is a small area divided off which they can use at night that has a heating unit within it. The heating unit (a 40watt Infrared non-light emitting bulb used for reptiles) is safely separated within this area and is also on a timer. This will allow me to set the temp. in the larger room lower at night (10C). From what I've discovered, this is about the normal temps that occur in Australia at night during the colder months.
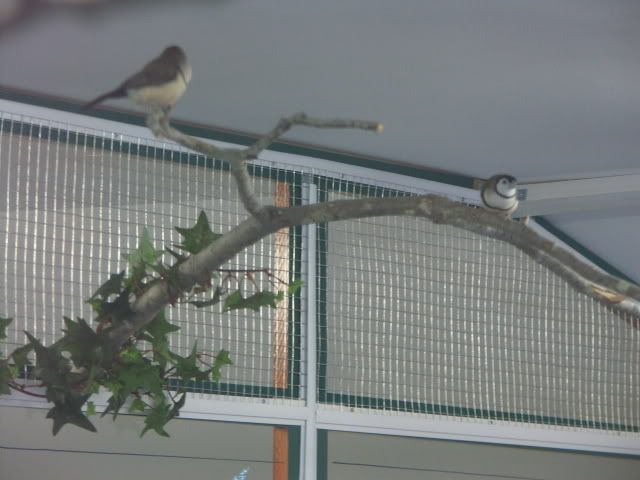
The owls have been in the aviary for a couple days now. At first they seemed bewildered by the amount of space they found themselves in. Took them a while to get their bearings, but now they are zooming around with no problem. I was concerned about the plexiglass, so I drew some lines on it (non-permanent) and placed stickers as well. Both the male and female flew into the plexiglass a few times. Fortunately, it has some bounce to it and they didn't hurt themselves. The female (the more inquisitive and relaxed of the two) was quicker to realize she should stay away from the glass. The male took another day or so to realize this too. I'll remove the lines in time. The stickers I may keep. Both seem to be enjoying the new home now.
There are still some small things to do to finish it up. I only have a temporary feed/water setup at this time, until I decide what I want permanently. I need to make a base for the fountain which will hold the filter. I also need to work on more getting more plantlife (fake and real). The solid panel on the one end of the aviary is temporary. Eventually the flight will continue down the side of the room (and maybe outside).
Any comments,suggestions or questions welcome.
Aviary pics:

It's located in a large room over my garage. Size is 15' x 8'. It can be easily divided into 2 flight areas if required. Two double doors provide access as well as a series of plexiglass sliding doors along the bottom. The day lights, night light (15watt), and waterfall (9watt) are on timers. The waterfall is powered by a Fluval aquarium filter. So far the owls haven't gone near the waterfall. I'm hoping in time they'll get used to it. There is a small area divided off which they can use at night that has a heating unit within it. The heating unit (a 40watt Infrared non-light emitting bulb used for reptiles) is safely separated within this area and is also on a timer. This will allow me to set the temp. in the larger room lower at night (10C). From what I've discovered, this is about the normal temps that occur in Australia at night during the colder months.
The owls have been in the aviary for a couple days now. At first they seemed bewildered by the amount of space they found themselves in. Took them a while to get their bearings, but now they are zooming around with no problem. I was concerned about the plexiglass, so I drew some lines on it (non-permanent) and placed stickers as well. Both the male and female flew into the plexiglass a few times. Fortunately, it has some bounce to it and they didn't hurt themselves. The female (the more inquisitive and relaxed of the two) was quicker to realize she should stay away from the glass. The male took another day or so to realize this too. I'll remove the lines in time. The stickers I may keep. Both seem to be enjoying the new home now.
There are still some small things to do to finish it up. I only have a temporary feed/water setup at this time, until I decide what I want permanently. I need to make a base for the fountain which will hold the filter. I also need to work on more getting more plantlife (fake and real). The solid panel on the one end of the aviary is temporary. Eventually the flight will continue down the side of the room (and maybe outside).
Any comments,suggestions or questions welcome.
Aviary pics: