How I Built my Small Flight Cage/Breeding Cage

For questions about finch enclosures (cages & aviaries).
User avatar
franny
Weaning
Weaning
Posts: 1631
Joined: Fri Jul 25, 2008 5:19 pm
Location: Winnipeg, MB. Canada
Contact:

How I Built my Small Flight Cage/Breeding Cage

Post by franny » Fri Aug 08, 2008 1:16 pm

Hi All,

Just edited this post as my website was moved and the photos weren't showing. 12/28/9

Someone in another thread asked how I built my cage, so here are some instructions which I hope will help. Wish I'd taken pictures while work was in progress! It's a long post, so please give it time for pictures to all load.

Here's a photo of the completed cage, with birds in it.
Image

Here's the rough plan I used to calculate how much wood, etc. to buy:
Image

First step was to build the frame out of 1 X 1 molding.
Basic butt joint construction on front and back frame- Note that front frame has the bottom piece of 1 X 1 at about 3 inches up from bottom to allow room for slide out tray.
Image

Used corner brackets to attach the two frames together with 20" side pieces.
Image

Then framed in doors on sides (put them horizontally so as not to block view when I stood next to cage), and on the back (framed it in vertically to give more stability and avoid problem of no place to put screws without bumping in to the screws from the frames screwed in for the side doors). :roll:
Image

Then attached the 1 X 1 3" wooden skirt, and the half round molding at the top of it, to direct seed into the tray.

Then I did a dumb thing :oops: and put the bottom on the cage. If I were doing it again, I might dry fit it, then take it off, to make it easier to work on the rest, and put the bottom on last!!!

I stapled the wire on the cage, and cut out the openings for 3 door openings. At this point I put the doors on, as I wanted to hide as much of the hinges as possible with trim over top. However this makes it a bit hard to lift the doors, so next time I'd wait and put the hinges on the outside of the trim.
Image

Next I used screws to attach all the outside trim (corner molding, flat 1 inch trim for door framing and two light supports on top of cage, and 3inch X 1/4 inch trim for the outside of the skirt, and 2 1/4" X 1/4 inch trim for the tray door. For the 3 small doors, because of the thickness of the trim, I used very thin balsa wood. But if you put the hinges on the "outside" of the trim, the doors will likely swing more freely.

This is the point where you use wood filler to fill the space between the wire and the trim if you are going to. I did because I didn't like the idea of seed husks and dust, and maybe even mites collecting in there. It's the hardest part, trying to be neat, and squish it in-between the wires when the openings are only 3/8 inch! But it does keep the cage easier to clean. It will need a day to dry, and if there are wide gaps, it may shrink and you'll need to fill again. Then several coats of varnish over all wood and wood filler
Image

Varnish the bottom of the cage and then attach it last. Then when dry you can insert the wooden tray (at least 6 coats of varnish on this!).

Perches, some are natural, some dowels. The top perches are 3/8" dowel inserted through some scrap 1 X1 sanded a bit round on the corners. I used a saw blade to scratch these up a bit on the sides and underside to give the birds better grip.
Image
Image

Feeders are held in place with picture wire.
Image

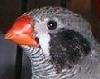
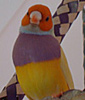
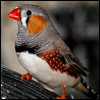
And lastly, here are Dick and Jane in their new home! :D
Image
Image
Last edited by franny on Mon Dec 28, 2009 12:05 pm, edited 1 time in total.

User avatar
hilljack13
Jute Junkie
Jute Junkie
Posts: 524
Joined: Sat Jan 26, 2008 11:05 pm
Location: Fort Walton Beach, FL

Post by hilljack13 » Fri Aug 08, 2008 5:57 pm

Thanks Franny!! I'll see what I can mess up...I mean do!!

User avatar
hilljack13
Jute Junkie
Jute Junkie
Posts: 524
Joined: Sat Jan 26, 2008 11:05 pm
Location: Fort Walton Beach, FL

Post by hilljack13 » Fri Aug 08, 2008 6:02 pm

BTW your birds are beautiful!!

User avatar
dfcauley
Molting
Molting
Posts: 6892
Joined: Sun Mar 23, 2008 9:28 am
Location: Carrollton, Georgia

Post by dfcauley » Fri Aug 08, 2008 8:43 pm

Now THAT is a beautiful cage for two such small birds. I am sure they will love their nice home. :lol:
Donna

zahari
Pip
Pip
Posts: 14
Joined: Sun May 06, 2007 9:50 am

Post by zahari » Sun Aug 10, 2008 1:24 am

Nice cage n beutiful bird too. Congrats. :wink:

User avatar
Kiko
Persistent Pursuer
Persistent Pursuer
Posts: 291
Joined: Sun Jan 20, 2008 5:51 pm
Location: Ontario Canada

Post by Kiko » Sun Aug 10, 2008 7:06 am

Great cage Franny, good design and well built. Some very happy and beautiful birds too!
Lynn

User avatar
hfentj
Flirty Bird
Flirty Bird
Posts: 231
Joined: Sat May 31, 2008 8:39 am
Location: Egan, Texas

Post by hfentj » Sun Aug 10, 2008 10:26 am

Your cage puts my home made cages to shame. So much detail, awsome work there. And good ideas. :) Heidi

User avatar
FinchMommy
Callow Courter
Callow Courter
Posts: 176
Joined: Sun Aug 03, 2008 2:14 pm
Location: Winnipeg Manitoba

Post by FinchMommy » Sun Aug 10, 2008 11:09 am

Awesome cage! I wish I could do stuff like that.

User avatar
franny
Weaning
Weaning
Posts: 1631
Joined: Fri Jul 25, 2008 5:19 pm
Location: Winnipeg, MB. Canada
Contact:

Post by franny » Sun Aug 10, 2008 9:46 pm

Thanks to FinchMommy, hfentj, Kiko & zahari for your compliments! It was a lot of fun trying to plan it out. Wanted to make it look like a nice piece of furniture, but also wanted to make it practical to clean, wanted feeders on the outside so I had to get in to it less often. The doors drop down automatically as you let go of them, so less chance of any escapes.

I placed the top two perches as far apart as I could so they'd have to fly (2 feet apart). Put the charcoal and oystershell feeder nearest the nest (perch on the right) because it was the corner that I seldom need to go near (it doesn't need refilling often) so they would be disturbed less if they lay eggs. Put the water on the far perch (to make them have to fly often instead of just hop outside the nest for a drink. The lower perches have two varieties of seeds (one with dried greens and pellets mixed in, the other a more basic seed mix), and because of the height of the cage, they have to fly almost vertically to get back to the nest from the lowest perch (20").

The T shaped upper perches are just to give me another convenient place to put cuttlebone or treat feeders, right above the side doors, and the birds do seem to like the flat perches as much as the round ones.

But the natural perches are best, as Jane had a hard time hanging on when Dick tried to mate with her, when she was perched on the dowel. But had no problem when she dropped down to one of the natural perches! :wink:

User avatar
hfentj
Flirty Bird
Flirty Bird
Posts: 231
Joined: Sat May 31, 2008 8:39 am
Location: Egan, Texas

sharing a thought

Post by hfentj » Sun Aug 10, 2008 10:19 pm

Franny, just a thought, something I wish I would have added when I built my cages. I used some window screen, the cloth type around the lower part of my cage to catch the seeds and shells that would fly out. I have it stapled on for now. Have even thought about using a pretty window sheer panel, but I think it would have to be removeable to clean. Helps on the messes when the birds decide to get some flying in. Heidi :idea:

User avatar
franny
Weaning
Weaning
Posts: 1631
Joined: Fri Jul 25, 2008 5:19 pm
Location: Winnipeg, MB. Canada
Contact:

Re: sharing a thought

Post by franny » Sun Aug 10, 2008 10:29 pm

hfentj wrote:Franny, just a thought, something I wish I would have added when I built my cages. I used some window screen, the cloth type around the lower part of my cage to catch the seeds and shells that would fly out. I have it stapled on for now. Have even thought about using a pretty window sheer panel, but I think it would have to be removeable to clean. Helps on the messes when the birds decide to get some flying in. Heidi :idea:
Thanks hfenti - but I do plan to cut some plexi-glass and inset it in the areas below the doors, back and sides. I'll use mirror clips similar what some picture frames have on the back to hold them in place, and that will keep seeds and husks from flying out, but not impede the view. They are easily removed to wash when they get soiled. I did it with the last cage and it worked great. I just haven't got around to cutting the plexi-glass to size yet.

Plexi glass is now in - makes a huge difference in the amount of scattered seed! =D>
Attachments
IMG_5263-sm.jpg
IMG_5262sm.jpg
Last edited by franny on Thu Oct 22, 2009 2:10 pm, edited 1 time in total.

User avatar
hfentj
Flirty Bird
Flirty Bird
Posts: 231
Joined: Sat May 31, 2008 8:39 am
Location: Egan, Texas

Post by hfentj » Sun Aug 10, 2008 10:45 pm

Yes that would work on your cage. I would have to put some more 1xs in my cages for that to work. And my birds would not be to happy with the idea, so IF I build another, might try your idea. I have two cages that I built on roll around utility carts and one flight cage I bought. One is for my different kinds of Zebras and Societies and the other is for my Gouldians and the one I bought has my Owls in it and they take up a lot of room. But there is always enough room for more. :D :wink: Heidi

FeatherHarp

Post by FeatherHarp » Mon Aug 11, 2008 9:32 am

Franny...your cage is wonderful....you sure are talented! Your birds have such wonderful colors too! :D

ckoral
Pip
Pip
Posts: 3
Joined: Fri Mar 27, 2009 2:46 pm

Re: How I Built my Small Flight Cage/Breeding Cage

Post by ckoral » Fri Sep 04, 2009 3:10 pm

That is a very nice design. My father built a cage about 2x that size verticle when I was young. That cage sat in the garage for the longest time then we sold it. I so with we still had it. Down to the shop I go :) This time I am going to make it a wall mount horizontal cage with 3 seperate cleaning trays.

northernmist

Re: How I Built my Small Flight Cage/Breeding Cage

Post by northernmist » Mon Dec 28, 2009 12:32 pm

Franny you have a very beautiful set up here. I hope some day I may have the same ;)
Your birds are beautiful.

Post Reply