Mike's 60"x30"x36" Cage Build
-
Casper
- Fledgeling

- Posts: 105
- Joined: Tue Apr 16, 2013 1:34 am
- Location: Adelaide, South Australia
Re: Mike's 60"x30"x36" Cage Build
good work, it is a similar size to our sun room cage, that is 60'' x 40'' x 40'', it is a good size for my 6 little zebras plenty of space. I have had a plexiglass tray made for the bottom and we have a clear plastic around the bottom 6'' of the cage! i put the plastic on the outside of the wire, if I did it again I would put it instead of the wire, seed and feathers seem to gather in the gap and it drives me nuts!
Totally owned by a spoodle called Pepsi, 4 very cute zebra finches (2 fawn females, 1 ??? and 1 white male) and about 60 guppies! And loving every minute of it!
-
mike
- Novice Nester

- Posts: 420
- Joined: Sun Mar 22, 2009 3:21 pm
- Location: Toronto, ON, Canada
Re: Mike's 60"x30"x36" Cage Build
Thanks everyone. I'm using this cage as a learning experience. I won't be staining it or decorating it at all. It will be in my unfinished basement so it doesnt have to look nice. I've already made some mistakes that I won't make again. But I thought I would make this thread to show how I am building a big cage so that others can get ideas. You can get all of your wood precut at the home centre and just glue and screw it if building seems daunting. I'm not much of a builder but I thought I would try this out once in life. I may not even use it.
Mike
2 Finch-eating cats

2 Finch-eating cats
-
Ginene
- Molting

- Posts: 4333
- Joined: Fri Feb 08, 2013 9:52 pm
- Location: Staten Island, New York
Re: Mike's 60"x30"x36" Cage Build
mike
Hey Mike, if you decide not to use it, you should sell it. Someone would snatch it up right away and finish/decorate it to their own taste. I'm sure you will do many things differently next time around, but for someone else it may be perfect. At least you can earn back the money you spent on the materials. Just a thought...
Hey Mike, if you decide not to use it, you should sell it. Someone would snatch it up right away and finish/decorate it to their own taste. I'm sure you will do many things differently next time around, but for someone else it may be perfect. At least you can earn back the money you spent on the materials. Just a thought...
-
Toddmin
- Sisal Slave

- Posts: 569
- Joined: Tue Feb 05, 2013 8:34 am
- Location: Atlanta, GA
Re: Mike's 60"x30"x36" Cage Build
Casper - Where did you get your plexiglass tray made? I've been looking for something to fabricate a tray, but haven't found anything suitable yet.
- Todd
-
Casper
- Fledgeling
- Posts: 105
- Joined: Tue Apr 16, 2013 1:34 am
- Location: Adelaide, South Australia
Re: Mike's 60"x30"x36" Cage Build
Toddmin Todd I had it made by a local firm, Menzel plastics, I don't know if they will ship! There would have to be some one who does it in the US!
Mine cost $60 but it was worth it!
Mine cost $60 but it was worth it!
Totally owned by a spoodle called Pepsi, 4 very cute zebra finches (2 fawn females, 1 ??? and 1 white male) and about 60 guppies! And loving every minute of it!
-
poohbear

- Weaning

- Posts: 1991
- Joined: Sun Apr 13, 2008 1:33 pm
- Location: Nottinghamshire UK
Re: Mike's 60"x30"x36" Cage Build
These trays made for tomato growbags are 16 inches by 46 inches...A handy size for those making their own cages.Cheap too.


-
mike
- Novice Nester
- Posts: 420
- Joined: Sun Mar 22, 2009 3:21 pm
- Location: Toronto, ON, Canada
Re: Mike's 60"x30"x36" Cage Build
The next part of this series will be a little out of order. I didn’t necessarily complete each panel before moving on to the next so there is some back and forth and some of the pictures will show the cage at different stages of completion.
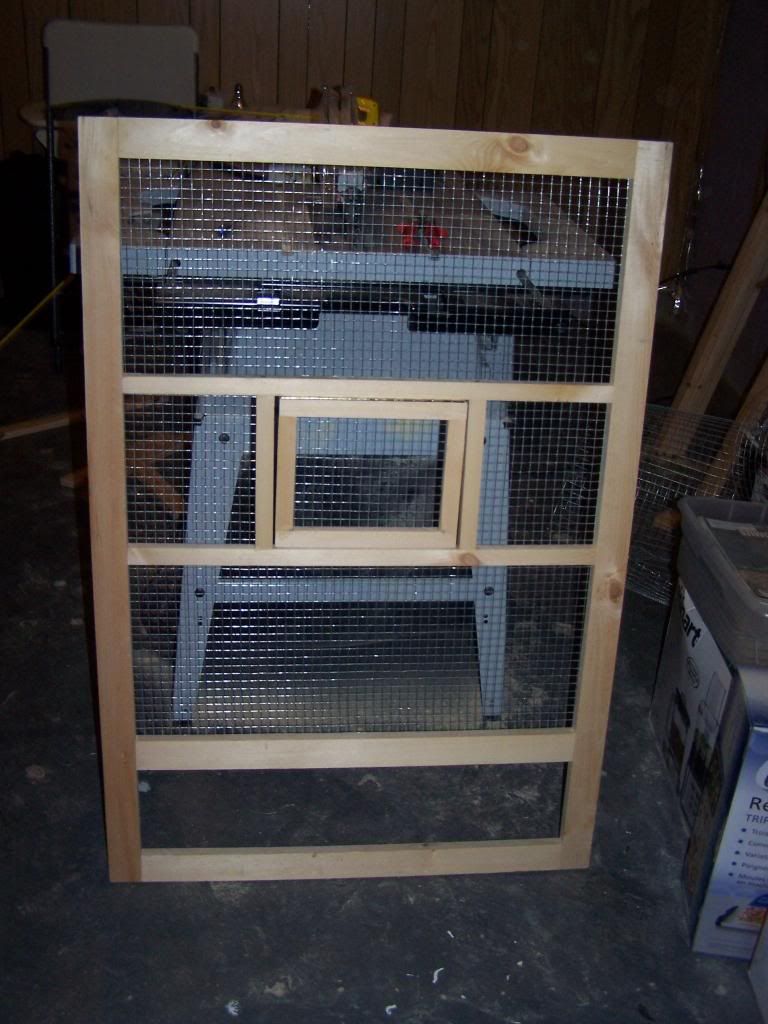
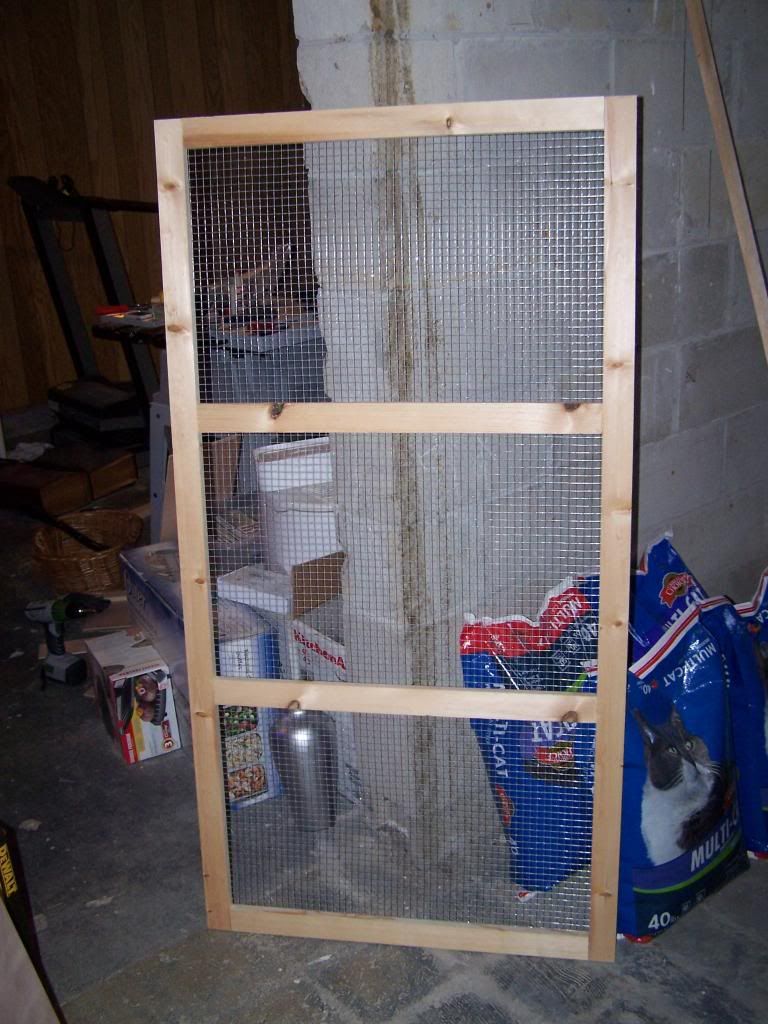
Side panels
To make the side panels I followed the same pattern as the front. I glued and screwed a 2”x26” strip at the top and at the bottom between two (2) 2” vertical strips.
I then added two (2) 1” horizontal strips for the door.
I then added mesh to the frame. I will admit that I made a mistake at this point. I should have completed the entire frame (as you will see next) before adding the mesh. It worked out but I was lucky.
I added the smaller vertical beams to hold the door.
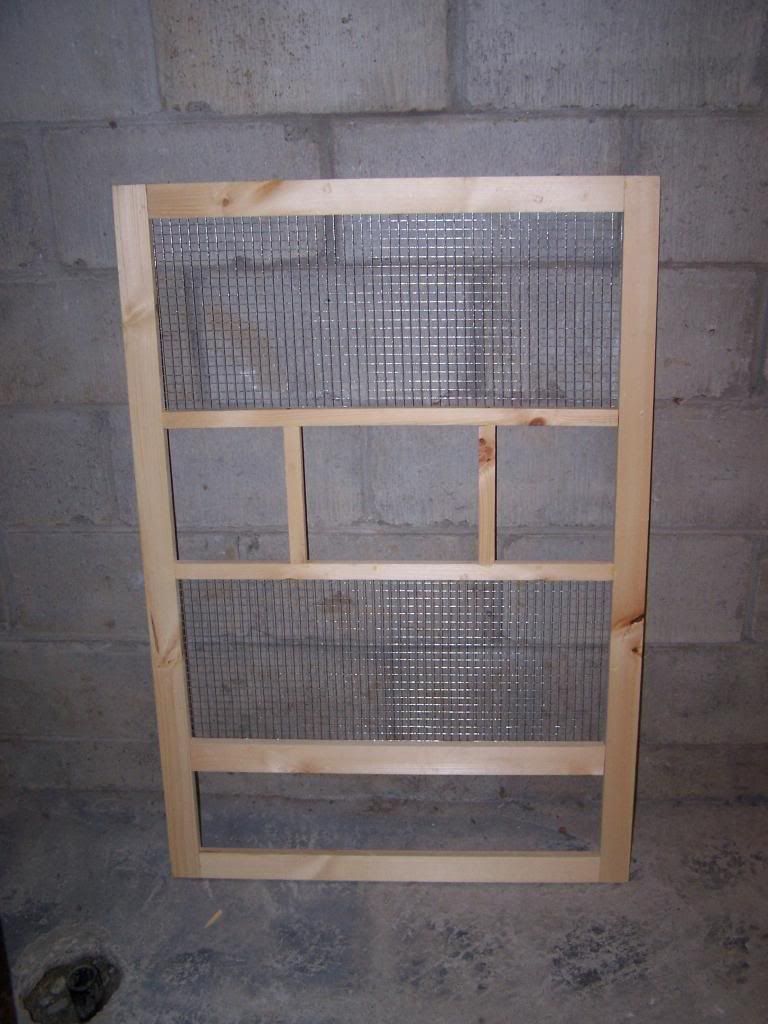
And then I added mesh to the either side of the door.
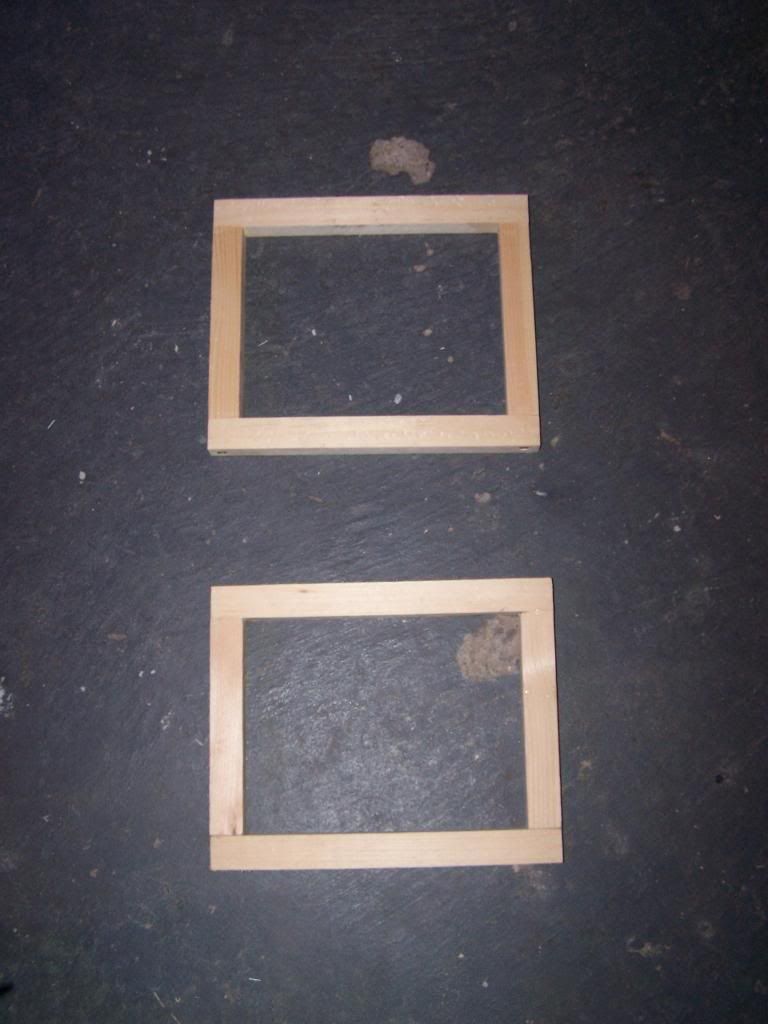
I assembled the doors:
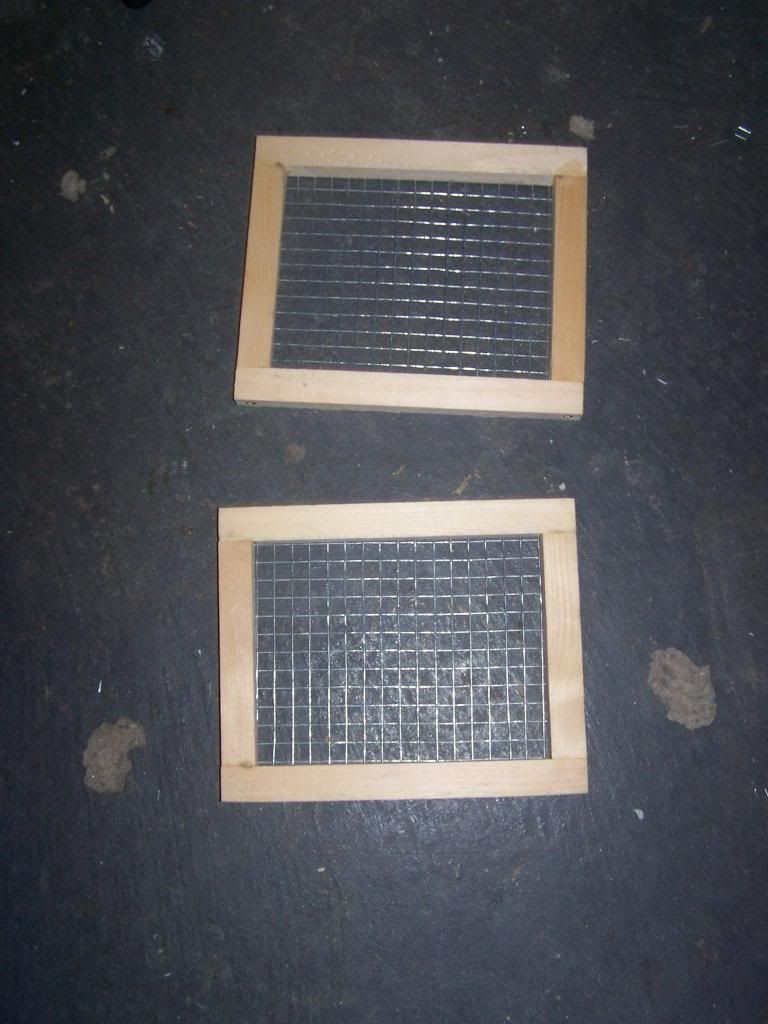
Then I added the mesh:
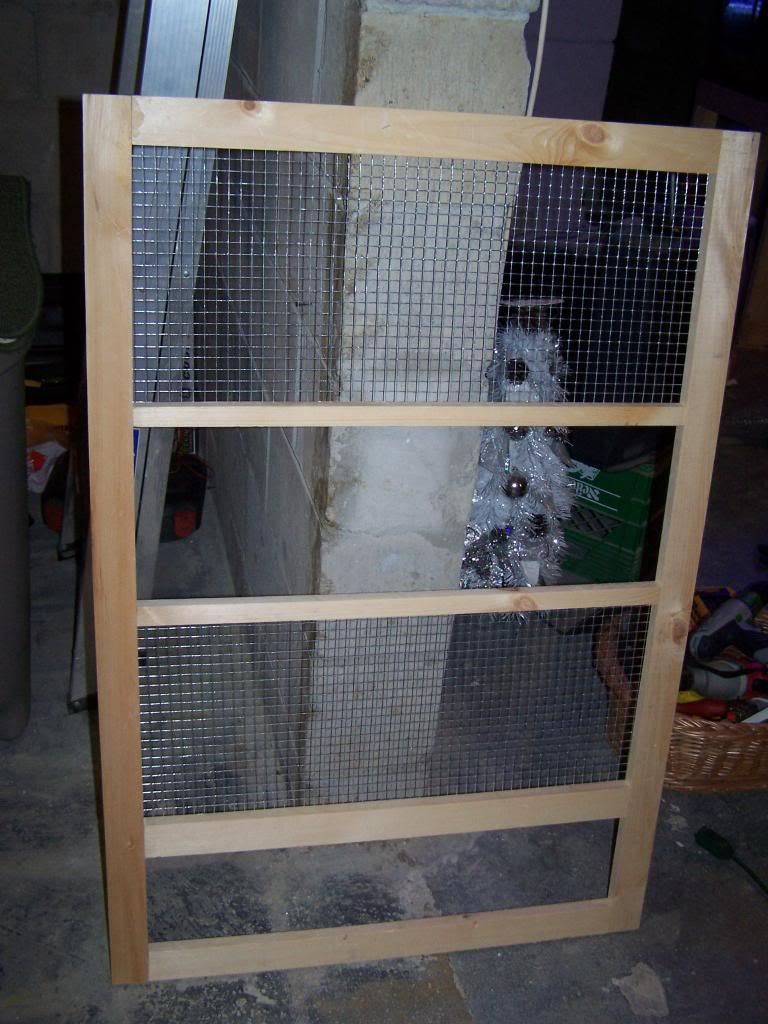
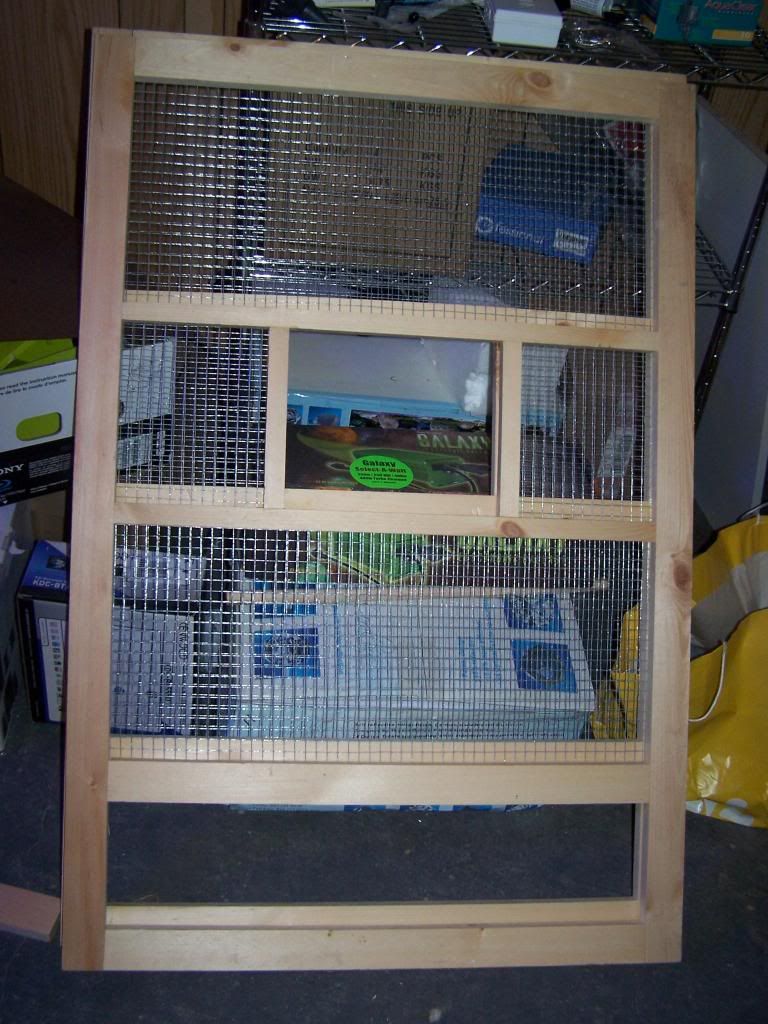
Here is the complete side panel:
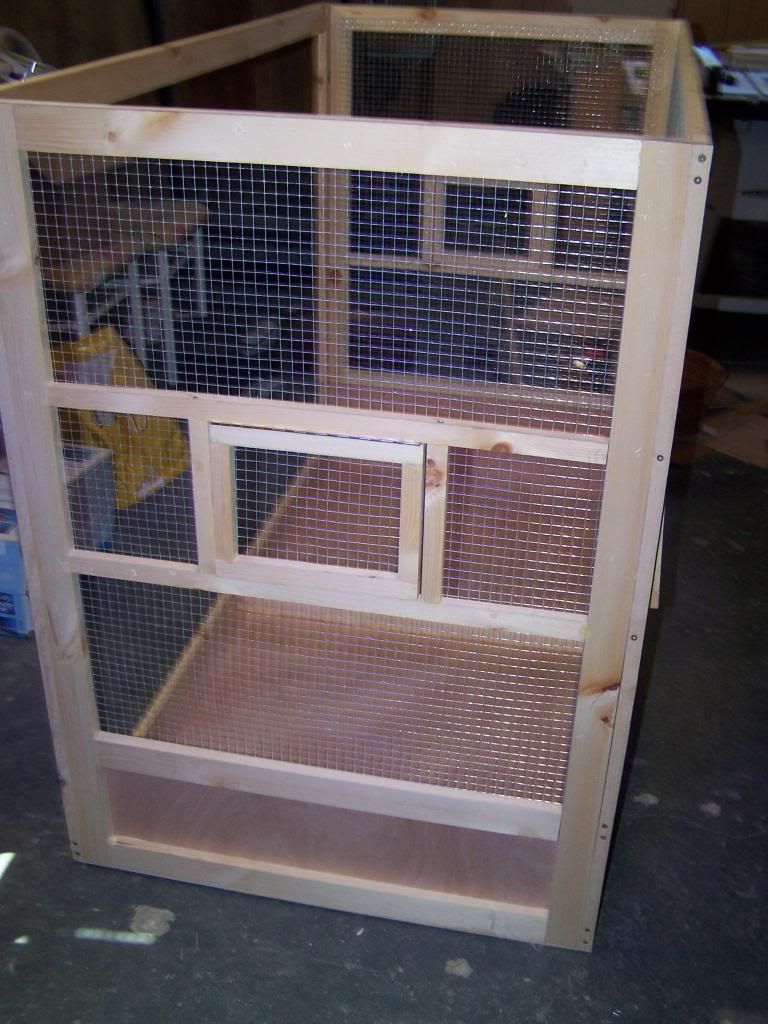
And this is the side panel attached:
Side panels
To make the side panels I followed the same pattern as the front. I glued and screwed a 2”x26” strip at the top and at the bottom between two (2) 2” vertical strips.
I then added two (2) 1” horizontal strips for the door.
I then added mesh to the frame. I will admit that I made a mistake at this point. I should have completed the entire frame (as you will see next) before adding the mesh. It worked out but I was lucky.
I added the smaller vertical beams to hold the door.
And then I added mesh to the either side of the door.
I assembled the doors:
Then I added the mesh:
Here is the complete side panel:
And this is the side panel attached:
Mike
2 Finch-eating cats
2 Finch-eating cats
-
mike
- Novice Nester
- Posts: 420
- Joined: Sun Mar 22, 2009 3:21 pm
- Location: Toronto, ON, Canada
Re: Mike's 60"x30"x36" Cage Build
Rear
For the rear, I assembled it essentially the same way as the front.
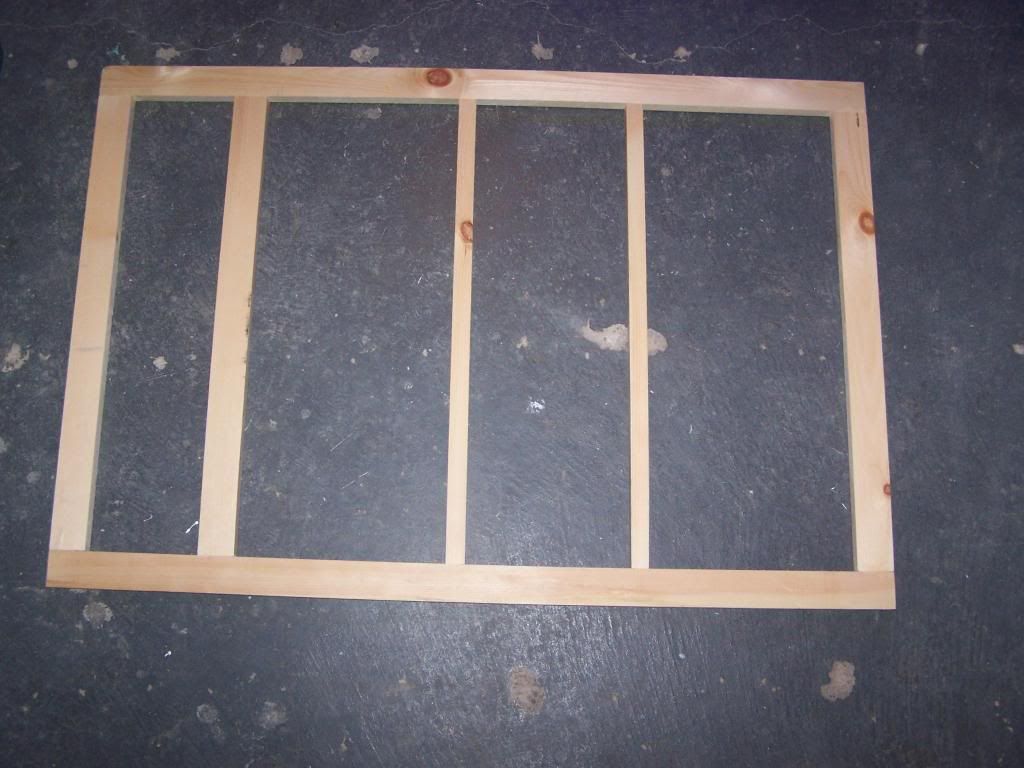
Here is the basic frame which is just the two (2) horizontal beams between the two (2) vertical beams:
After this, I added the 1” beams the same way I did for the front. The only difference is that I will not add the smaller vertical beams for the doors. Obviously there will be no doors.
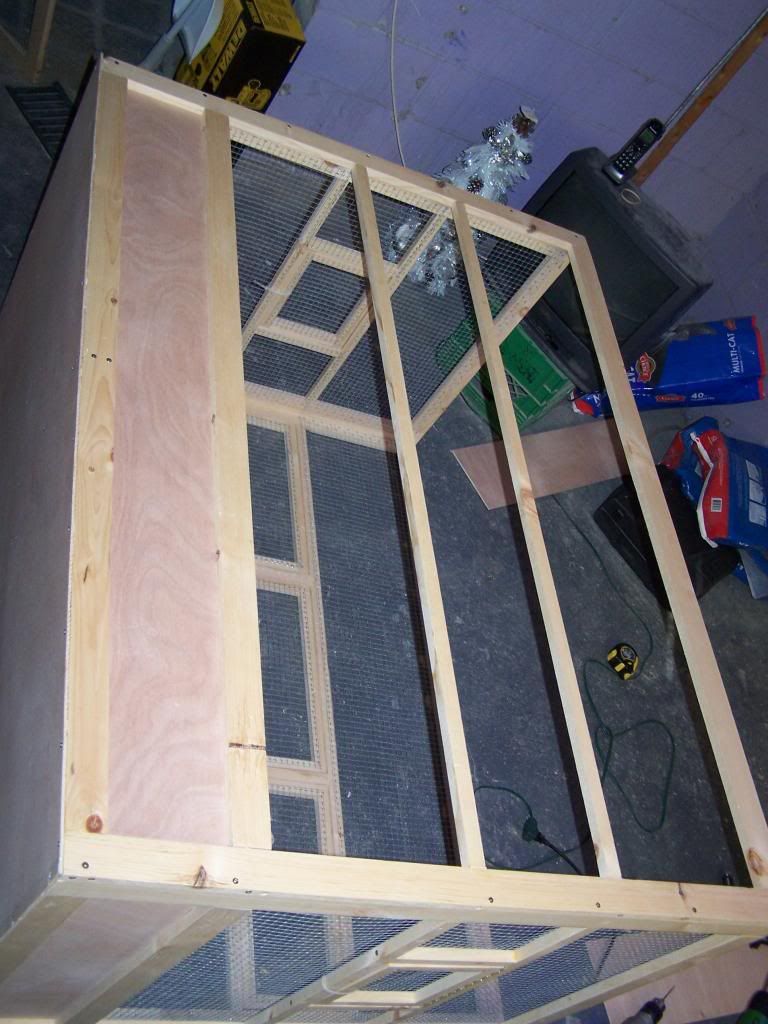
I was originally going to add corrugated plastic to the back of the cage but I figured the birds would want another place to land on and they can’t do that with the plastic.
Then I added the mesh.
For the rear, I assembled it essentially the same way as the front.
Here is the basic frame which is just the two (2) horizontal beams between the two (2) vertical beams:
After this, I added the 1” beams the same way I did for the front. The only difference is that I will not add the smaller vertical beams for the doors. Obviously there will be no doors.
I was originally going to add corrugated plastic to the back of the cage but I figured the birds would want another place to land on and they can’t do that with the plastic.
Then I added the mesh.
Last edited by mike on Fri May 10, 2013 3:59 pm, edited 1 time in total.
Mike
2 Finch-eating cats
2 Finch-eating cats
-
mike
- Novice Nester
- Posts: 420
- Joined: Sun Mar 22, 2009 3:21 pm
- Location: Toronto, ON, Canada
Re: Mike's 60"x30"x36" Cage Build
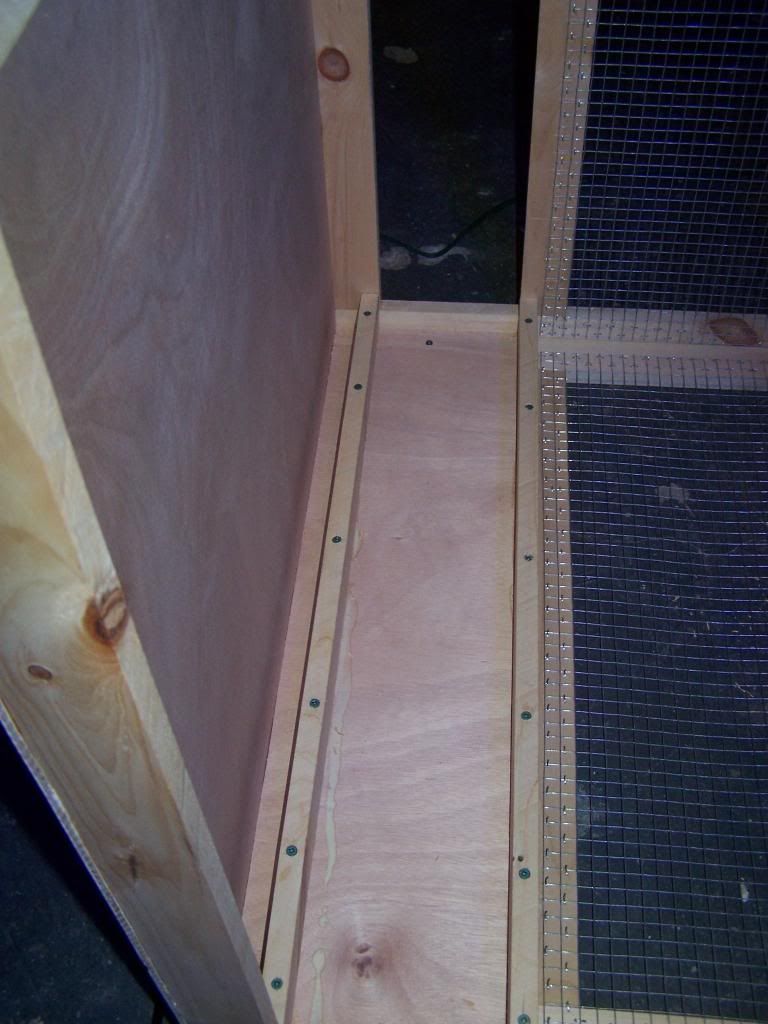
Bottom
I installed 5/8” plywood to the bottom of the cage. I used this to keep the frame square and to keep anything else contained within the cage.
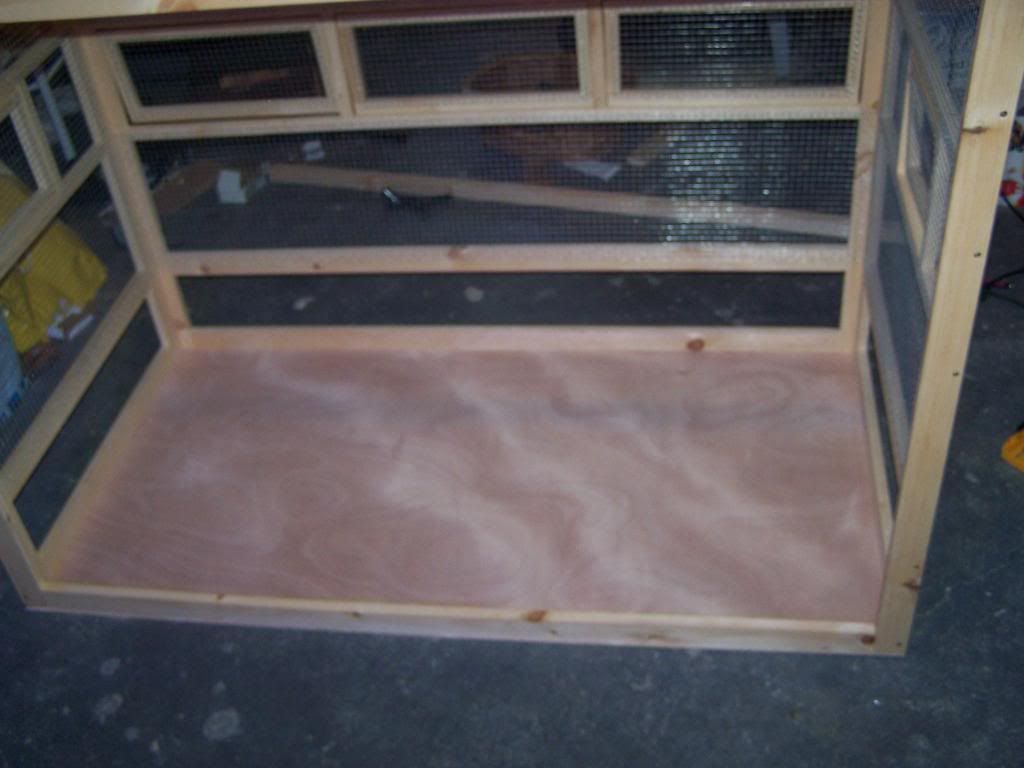
I then added runners for the bottom drawer to rest on. These are four (4) 2”x30” strips that are glued and screwed to the side panels:
I installed 5/8” plywood to the bottom of the cage. I used this to keep the frame square and to keep anything else contained within the cage.
I then added runners for the bottom drawer to rest on. These are four (4) 2”x30” strips that are glued and screwed to the side panels:
Mike
2 Finch-eating cats
2 Finch-eating cats
-
debbie276
- Bird Brain

- Posts: 14789
- Joined: Fri Aug 28, 2009 7:30 am
- Location: WV
Re: Mike's 60"x30"x36" Cage Build
coming along nicely! 

Debbie
long time breeder of lady gouldians:
Green
SF Pastel (SF Yellow)
Pastel (Yellow)
Blue
SF Pastel Blue (SF Yellow Blue)
Pastel Blue (Yellow Blue)
GREAT articles on avian lighting:
https://mickaboo.org/confluence/downloa ... ummary.pdf
http://www.naturallighting.com/cart/sto ... sc_page=56
long time breeder of lady gouldians:
Green
SF Pastel (SF Yellow)
Pastel (Yellow)
Blue
SF Pastel Blue (SF Yellow Blue)
Pastel Blue (Yellow Blue)
GREAT articles on avian lighting:
https://mickaboo.org/confluence/downloa ... ummary.pdf
http://www.naturallighting.com/cart/sto ... sc_page=56
-
Ginene
- Molting
- Posts: 4333
- Joined: Fri Feb 08, 2013 9:52 pm
- Location: Staten Island, New York
Re: Mike's 60"x30"x36" Cage Build
Beautiful job ! Can't believe you are actually considering not using it. I want it for myself... 
-
nelloyello11

- Weaning
- Posts: 1901
- Joined: Sun Feb 13, 2011 11:50 pm
- Location: Buffalo, NY
Re: Mike's 60"x30"x36" Cage Build
You don't need a man to do it!!! I do have a fantastic one of those, but I built mine all by myself, with only a mitre saw, a screw gun, and a staple gun!Ginene wrote: God, what I would do for a guy wearing a full tool belt, and knows how to use it! Oh well...a woman can dream
http://www.finchforum.com/viewtopic.php?f=2&t=14766
Nelissa

1 NG (Peter), 2 SF/FF (Astrid & Nina) and 2 BC (Desmond & Penelope) Zebra finches
2 Owl Finches (Hedwig & Fawkes)
Painted turtle (Keeker)
1 NG (Peter), 2 SF/FF (Astrid & Nina) and 2 BC (Desmond & Penelope) Zebra finches
2 Owl Finches (Hedwig & Fawkes)
Painted turtle (Keeker)
-
Ginene
- Molting
- Posts: 4333
- Joined: Fri Feb 08, 2013 9:52 pm
- Location: Staten Island, New York
Re: Mike's 60"x30"x36" Cage Build
nelloyello11
WOW !!! I love your Quad!!! It's awesome!!! Congrats for building this on your own . Truly...I wish I could do the same. I have the design ideas, the planning capabilities, and the ability to choose materials...my issue is truly that I will lose a finger...or two. My husband and I have executed MANY beautiful woodwork projects in our home together (raised panel wainscoting in the dining room, recessed paneled bead-board ceiling in our son's room, etc.). I am a nut for "character" and "details," but am limited to the use of a hammer, hack saw, nail gun, sanding block and screw driver. If that's all this type of project requires, then I'm good to go...How much money did this project cost? (if you don't mind me asking
  ).
).
WOW
-
Ginene
- Molting
- Posts: 4333
- Joined: Fri Feb 08, 2013 9:52 pm
- Location: Staten Island, New York
Re: Mike's 60"x30"x36" Cage Build
mike
Hey Mike...any recent progress on the cage? Looking forward to seeing the end result . Wish I had the skills and ambition to build one myself...Would probably lose a finger or two.
Hey Mike...any recent progress on the cage? Looking forward to seeing the end result
-
mike
- Novice Nester
- Posts: 420
- Joined: Sun Mar 22, 2009 3:21 pm
- Location: Toronto, ON, Canada
Re: Mike's 60"x30"x36" Cage Build
Well, since you asked, here is the latest update.
Roof
The roof of the cage was pretty straightforward. I just made the frame to fit on top of the cage so it is 60” x 31.5”. I just added two additional strips in the middle and stapled mesh to it. I added a lot more staples top the top than the other parts of the cage because my cats will most definitely find their way to jump on top.
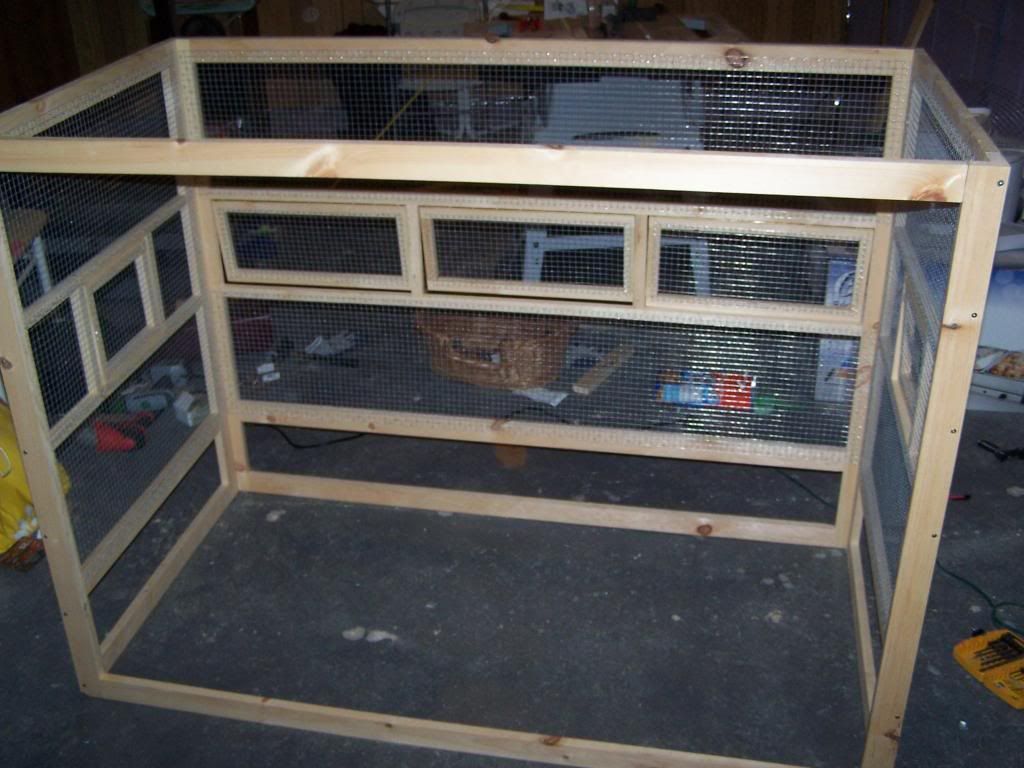
Drawer
By this time I had run out of “planning” ideas and just winged it. The drawer is made of ½” plywood for the bottom and sides. For the back, I used a piece of ½” pine and that is only because I messed up the plywood cut for the rear and pine is cheaper than plywood. For the front, I made it to look similar to the sides and back which was a frame of 1” pine around a ¼” brown wood (can’t remember the name). Just to improve the structure, I also added a piece of pine behind for support.
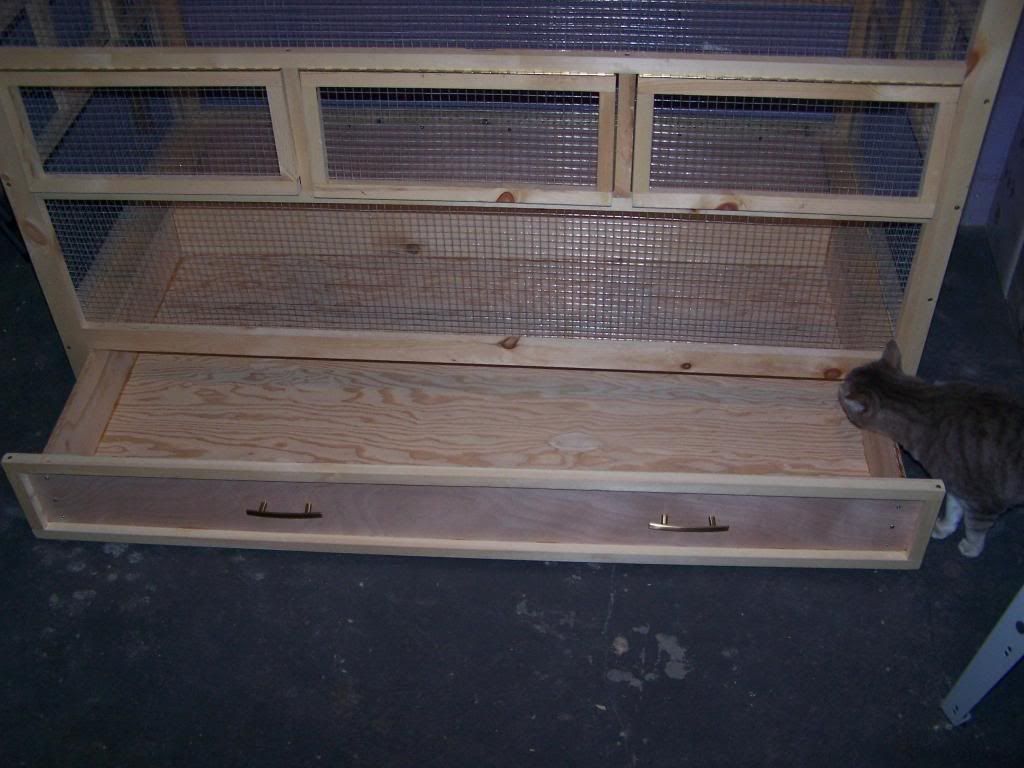
Then I added these nifty handles to pull the drawer out.
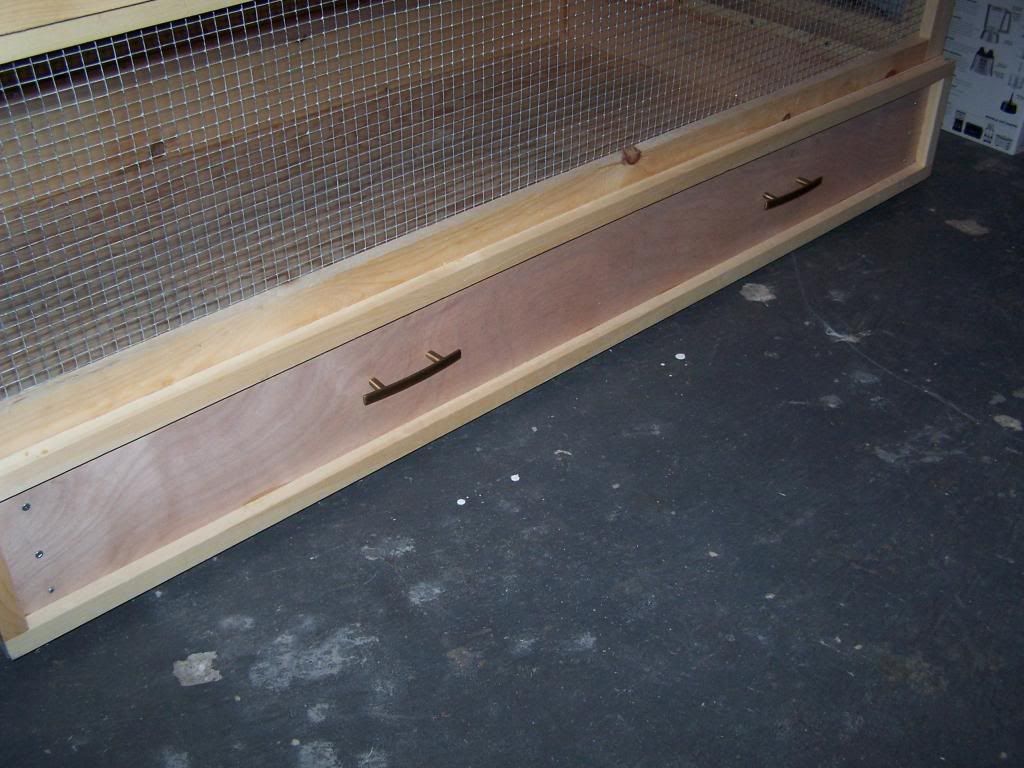
If I had planned it out, there wouldn’t be any screws through the face of the drawer … but I didn’t.
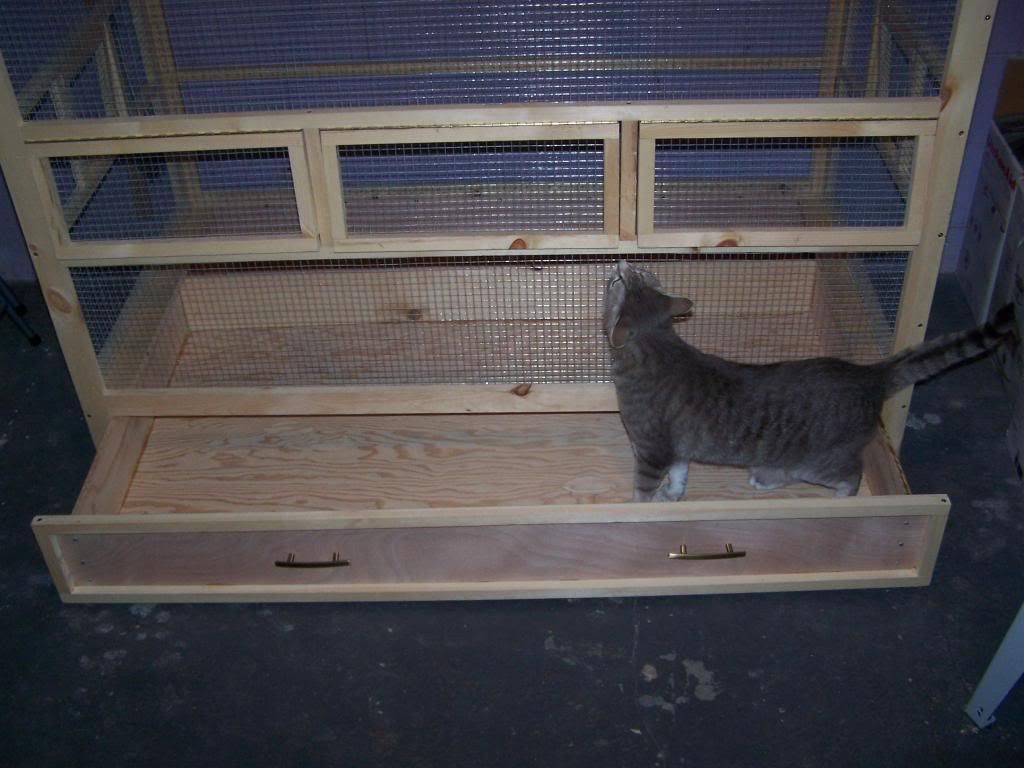
This is the cat investigating. He senses dinner:
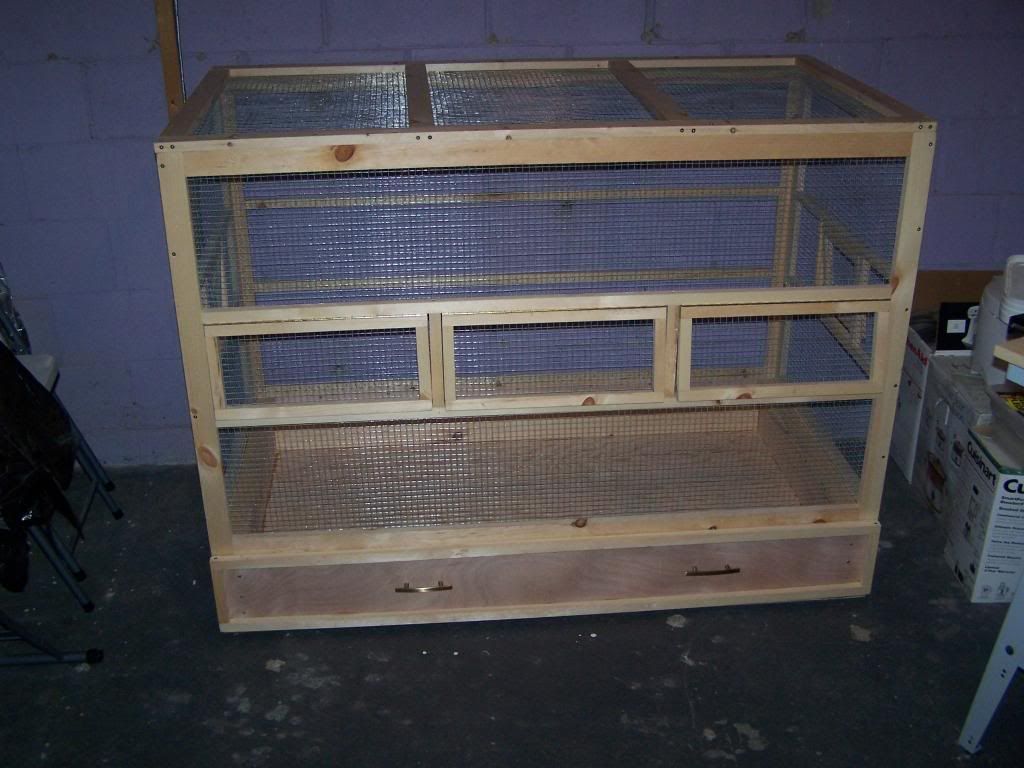
I just need to find tower latches for the doors. These proving hard to find because the door frames are only 1” and the tower latches I have around here are too big. I even tried Michael’s for doll house latches but no luck. Oh well, there is no rush.
Here is the complete cage without latches:
This project taught me a lot so if I were ever to do this again, the cage would turn out so much better. I'm not complaining because it did turn out pretty good for what it's worth. I'm not so sure how functional it will really be, though. For a "set it up and leave it" cage, it's great. But if I'll need to access the birds a lot it will be hard. I did build it with the expectation that I would use a net to catch the birds so there are no surprises.
Anyway, thanks for following.
Roof
The roof of the cage was pretty straightforward. I just made the frame to fit on top of the cage so it is 60” x 31.5”. I just added two additional strips in the middle and stapled mesh to it. I added a lot more staples top the top than the other parts of the cage because my cats will most definitely find their way to jump on top.
Drawer
By this time I had run out of “planning” ideas and just winged it. The drawer is made of ½” plywood for the bottom and sides. For the back, I used a piece of ½” pine and that is only because I messed up the plywood cut for the rear and pine is cheaper than plywood. For the front, I made it to look similar to the sides and back which was a frame of 1” pine around a ¼” brown wood (can’t remember the name). Just to improve the structure, I also added a piece of pine behind for support.
Then I added these nifty handles to pull the drawer out.
If I had planned it out, there wouldn’t be any screws through the face of the drawer … but I didn’t.
This is the cat investigating. He senses dinner:
I just need to find tower latches for the doors. These proving hard to find because the door frames are only 1” and the tower latches I have around here are too big. I even tried Michael’s for doll house latches but no luck. Oh well, there is no rush.
Here is the complete cage without latches:
This project taught me a lot so if I were ever to do this again, the cage would turn out so much better. I'm not complaining because it did turn out pretty good for what it's worth. I'm not so sure how functional it will really be, though. For a "set it up and leave it" cage, it's great. But if I'll need to access the birds a lot it will be hard. I did build it with the expectation that I would use a net to catch the birds so there are no surprises.
Anyway, thanks for following.
Mike
2 Finch-eating cats
2 Finch-eating cats