Hi everybody! I'm new to FINCHforum and so I'm excited to learn more from the pros.
SMALL INDOOR AVIARY PROJECT
I wanted to share some results from my first indoor aviary project. The project took several days to complete and it was a lot of work, but the results are fantastic (or at least I think so). I think anyone could do this and you don't need a lot of tools.
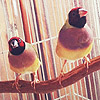
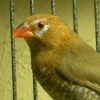
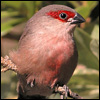
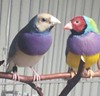
I acquired a gaggle of Gouldian finches and, so they needed some more space to fly around. I wanted something a little more aesthetic in which to house my birds, while keeping in mind their needs for space, access to food and water, nesting sites, and good sanitation. I also wanted a cage-free view of these little beauties! So here is my first prototype and how I did it. Hopefully someone will find this useful and possibly inspiring.
I started with an old china cabinet that I picked up from a used furniture dealer. It was in pretty sad shape, and so I had to sterilize this thing before I would think about touching it. Here are some of the steps I used to build it:
1. I first removed all the glass and wire from the cabinet. I saved the rubber strips that held the glass in place.
2. I took apart everything. I took off the back of the china cabinet and removed the doors. I also dismantled the top pieces using a power drill.
3. I had to use a hacksaw to remove the boards that held the glass shelving in the cabinet; they were inserted with tongue and groove, and so they wouldn't come out easily. I didn't throw away anything because I thought I could use it to build other components.
4. I filled the holes with wood filler and sanded them smooth. I also filled some other holes where mites or other insects might hide.
5. I installed the decorative piece that was on the top-front and moved it to face the back. This would be the "new front" of the indoor aviary, and I made measurements for what would become the plexiglass front. I left space at the bottom so I could build a drop-down door and a pull-out drawer to catch the mess. Because I wanted the aviary to have a finished look, I also measured the back so I could add a new piece (and trim) to the top of the back; this hides the ugly back of the arched decorative front piece. See the photos and this may make more sense.
4. Next, I headed off to home depot and bought the following items: (a) wood for a new top piece on the back of the cabinet, and another for the pull-down front that hides the drawer; (b) wood molding to hold the plexiglass on the front of the cabinet; (3) finishing molding to finish the back of the cabinet so that it better matched the new front; (4) hinges for the drop-down front, and new brushed nickel hardware; (5) a non-toxic, brightly colored paint and an accent color (white) to make my aviary more "fun and interesting"; and (5) a few vinyl "sticky" tiles for the bottom of the aviary. The great thing about stores like Home Depot is that they will cut your wood for you for free. Other than the miter-saw I picked up especially for this project on Craigslist ($60), I don't really own power tools!
Lastly, I ordered a piece of plexiglass from a local glass dealer that they cut to the correct size.
5. I got to work painting the cabinet pieces and installed and painted the new wood pieces. I also built the bottom tray, using the leftover wood from the shelf pieces that I cut out of the china cabinet. It was perfect because they had a small groove that held glass. I took advantage of this, and used these grooves to hold some corrugated poly sheeting that would form the drawer bottom. Now I had something to catch the poo! Cleaning the aviary regularly is an easier task with a pull-out drawer. I also built a small frame with some square wooden dowels on which a caged bottom could rest (just above the drawer).
6. Once everything was painted and dried, I cut apart some old flight cage pieces to position in the back and sides of the aviary. I lucked out here because the people from whom I acquired the birds had previously cut apart a 3-4 flight cages to build a large 4x4x2 flight cage (which I also have and need to assemble); there were a bunch of cage fronts and a few cage sides left over from that project that they gave me. I like the idea of using a caged back; it will ensure good air circulation and access points to place food, nest boxes, and perches for the birds. Another cool feature is that I re-installed the former doors of the china cabinet (on their original hinges) and so I can open two of these for major cleaning jobs on the inside of the aviary--for example, this comes in handy when I need to catch the birds or clean the plexiglass front.
I marked the cage pieces to the correct size, anticipated placement of doors, and used some heavy-duty wire nippers to cut the cage into pieces. The cabinet was tall and so I had to use several pieces to form the backs and sides. I was also careful to avoid any sharp edges that could injure the finches.
7. I installed the sticky tiles in the bottom of the aviary. I thought this would help the drawer slide in and out more smoothly. It also comes in handy...spooked finches are known to poo (I think that may be where the phrase "scared the crap out of me" comes from!) and vinyl is easy to clean. When the drawer is removed for cleaning, the finches may poo and I can easily wipe down the bottom before I replace the drawer.
8. Next I installed the plexiglass front. I had to make some narrow wood pieces that will hold the plexiglass at the correct height (i.e., to allow the drawer to slide under); I used some square wooden dowel for this. Next, I cut the molding to frame the plexiglass and hold it in place (the top of the plexi rests behind the decorative front piece, but additional molding was needed to frame it and hold the sides). Of course, I painted the molding on both sides before I installed it.
9. Now we were looking like an aviary! I installed the hinges for the drop-down bottom front (that hides the drawer)...popped the drawer inside...and installed the cage bottom to keep the birds out of their own mess.
10. Lastly, I wanted some additional lighting inside the cabinet. I picked up some LED strip lighting. This is expensive (ca. $69) but the perfect solution because it's perfectly flat. Not only can you cut the stuff to the exact size, you can link the pieces up in series. It even comes with a dimmer switch, so you can gradually put your finches into a bright or dark situation gradually. The lights are also energy efficient and don't produce heat! So no burnt birdies!
Voila! An indoor aviary is born (see pics below). I let the birds tell me how it works. I ended moving around a few perches and decided where best to place food dishes, etc.--i.e., to minimize soiling by the birds and maximize space for flying. So far so good. The only thing I needed to add (and I had something already) was a little plexiglass shelter for the birds' water. If I put a water dish on the side of the aviary, they splashed all over the front plexi. So, I moved the water to the cage floor and the shelter shields the water and eggshells from soiling; it also doesn't obstruct my view!
So what do you think? I love working in this (otherwise unused) room. The birds sing and makes me happy!
My indoor aviary project
-
Grant
- Mature

- Posts: 133
- Joined: Wed May 15, 2013 10:43 pm
- Location: Lansing, MI
- Contact:
My indoor aviary project
- Attachments
-
- Starting point: an old china cabinet.
-
- Deconstructed cabinet, new pieces added, painted, and reassembled.
-
- Patched holes and sanded smooth.
-
- Finished back/top, caged back and sides, plexiglass front and hardware installed.
-
- The finished product. I love sitting in this room.
Grant

1 Yorkshire Terrier and 1 Chihuahua
1 Yorkshire Terrier and 1 Chihuahua
-
Sally
- Mod Extraordinaire

- Posts: 17929
- Joined: Thu Mar 29, 2007 11:55 pm
- Location: DFW, Texas
Re: My indoor aviary project
Welcome to the forum, Grant! There's lots of good reading at the Finch Information Center, linked at left, and the members are always ready to answer questions.
Wow, what a great adaptation of an old china cabinet, it looks wonderful! Thank you so much for the detailed instructions and photos, as this is a help to all those who want to work on a similar project.
Wow, what a great adaptation of an old china cabinet, it looks wonderful! Thank you so much for the detailed instructions and photos, as this is a help to all those who want to work on a similar project.
-
debbie276
- Bird Brain

- Posts: 14789
- Joined: Fri Aug 28, 2009 7:30 am
- Location: WV
Re: My indoor aviary project
Welcome to the forum, Grant! 
What a great looking cage for your birds
best of luck
What a great looking cage for your birds
best of luck
Debbie
long time breeder of lady gouldians:
Green
SF Pastel (SF Yellow)
Pastel (Yellow)
Blue
SF Pastel Blue (SF Yellow Blue)
Pastel Blue (Yellow Blue)
GREAT articles on avian lighting:
https://mickaboo.org/confluence/downloa ... ummary.pdf
http://www.naturallighting.com/cart/sto ... sc_page=56
long time breeder of lady gouldians:
Green
SF Pastel (SF Yellow)
Pastel (Yellow)
Blue
SF Pastel Blue (SF Yellow Blue)
Pastel Blue (Yellow Blue)
GREAT articles on avian lighting:
https://mickaboo.org/confluence/downloa ... ummary.pdf
http://www.naturallighting.com/cart/sto ... sc_page=56
-
HiddenintheIvy
- Hatchling

- Posts: 54
- Joined: Sat May 12, 2012 10:40 pm
- Location: Denver, CO
-
Perfex
- Incubating

- Posts: 1016
- Joined: Sat Oct 27, 2012 8:17 pm
- Location: Memphis TN
Re: My indoor aviary project
Wow, really nice job! The new aviary looks bright and fresh. The gouldians will look fabulous in there.
Michelle P
Black Bellied Fire Finches
R/T Parrot finches (Normal and seagreen)
Forbes PF's
Blue Faced PF's
Gouldians
Owls
Variety of waxbills
Sun conure
10 rescued cats
4 Dobermans
Black Bellied Fire Finches
R/T Parrot finches (Normal and seagreen)
Forbes PF's
Blue Faced PF's
Gouldians
Owls
Variety of waxbills
Sun conure
10 rescued cats
4 Dobermans
-
Toddmin
- Sisal Slave

- Posts: 569
- Joined: Tue Feb 05, 2013 8:34 am
- Location: Atlanta, GA
-
Ginene
- Molting

- Posts: 4333
- Joined: Fri Feb 08, 2013 9:52 pm
- Location: Staten Island, New York
Re: My indoor aviary project
Wow, Grant...that is gorgeous!!! I'm completely jealous  . Welcome to the forum!!! It's a blast...
-
Rox
- Proven

- Posts: 2112
- Joined: Mon Mar 18, 2013 8:57 am
- Location: Cape Town, South Africa
Re: My indoor aviary project
That is really such a great idea! And I love the colours that you chose. I'm sure you and your birds are going to have a great time with their new aviary:)
Roxanne
Gouldian's, Blue Breasted Cordon Bleu's, Orange-cheeks, Violet-eared, Black-cheeked waxbill's and Peter's Twinspots
Gouldian's, Blue Breasted Cordon Bleu's, Orange-cheeks, Violet-eared, Black-cheeked waxbill's and Peter's Twinspots
-
finchandlovebird
- Proven
- Posts: 2052
- Joined: Fri Sep 02, 2011 7:35 pm
- Location: Wisconsin
Re: My indoor aviary project
Grant, that is absolutely fantastic  You are very talented. It's just so beautiful
Dolly J
1 Canary, 1 Parakeet
Raised Gouldians & Scarlet Chested Parakeets in past years
1 Canary, 1 Parakeet
Raised Gouldians & Scarlet Chested Parakeets in past years
-
wilkifam
- Weaning

- Posts: 1771
- Joined: Fri Aug 03, 2012 2:01 pm
- Location: South Central Montana
Re: My indoor aviary project
Absolutely Gorgeous! Amazing job!
Lori
Gouldians
Societies
Java FInches
Bourkes
Scarlets
Myers Parrot - Murphy
African Gray - Nzinga
2 GSD's - Heidi and Chiko
1 Minpin - Ted
1 Heinz 57 - Buster Brown
Chickens
Gouldians
Societies
Java FInches
Bourkes
Scarlets
Myers Parrot - Murphy
African Gray - Nzinga
2 GSD's - Heidi and Chiko
1 Minpin - Ted
1 Heinz 57 - Buster Brown
Chickens
-
ranchnanny
- Weaning

- Posts: 1560
- Joined: Sun Apr 03, 2011 12:47 pm
- Location: Terrebonne, Oregon
Re: My indoor aviary project
Green with envy that is one beautiful aviary!!!!!
Sherry
Canary
4 Parakeets
3 Schnauzers Archie Joey Tucker
Canary
4 Parakeets
3 Schnauzers Archie Joey Tucker
-
mayble
- Sisal Slave
- Posts: 563
- Joined: Wed Jan 23, 2013 11:34 pm
- Location: Michigan
Re: My indoor aviary project
Very nice!
-
30 Seconds to Bob
- Weaning
- Posts: 1786
- Joined: Tue Jul 31, 2012 7:12 pm
- Location: west central florida
Re: My indoor aviary project
Very elegant - not your average cage. Great job! Bob
3 canaries
2 orange cheeked waxbill finches
2 java finches, 1 split to normal, 1 white
2 bourke parakeets
1 american staffordshire/american pit bull terrier
1 boston/jack russel terrier mix
6 adopted stray cats
2 adult, 1 young leopard gecko
4 fish tanks and 4 fish bowls
3 turtles
2 teenage kids and 1 wife
2 orange cheeked waxbill finches
2 java finches, 1 split to normal, 1 white
2 bourke parakeets
1 american staffordshire/american pit bull terrier
1 boston/jack russel terrier mix
6 adopted stray cats
2 adult, 1 young leopard gecko
4 fish tanks and 4 fish bowls
3 turtles
2 teenage kids and 1 wife
-
EyesofFreedom

- Incubating
- Posts: 1009
- Joined: Tue Jan 01, 2013 12:27 pm
- Location: North Vernon, Indiana
- Contact:
Re: My indoor aviary project
Welcome to the forum Grant... you did an amazing job on the aviary
Zebra pair Scratch & Sniff
Owl Hekyl
-
Shelleypg1919
- Mature
- Posts: 120
- Joined: Mon May 20, 2013 9:04 am
- Location: Southeast Texas
Re: My indoor aviary project
AMAZING! That is exactly what I would want for mine.
Shelley and Tom
5 quarter horses, 2 mini horses, 1 golden retriever, 1 half golden retriever, 2 chinese crested dogs, 1 goat, 5 barn cats, 2 amazing kids and one almost perfect husband.
Birds:
Blue Pied Parrotlet
Pair of Strawberry Finches
2 Parakeets
50 Hens
1 Red True Araucana Rooster
30 Silkie eggs in the incubator